AUX CONFIGURATION
How to Configure Aux Time?
Follow these step-by-step instructions to create, manage,
import, edit, and delete Aux codes in the wAnywhere Console.
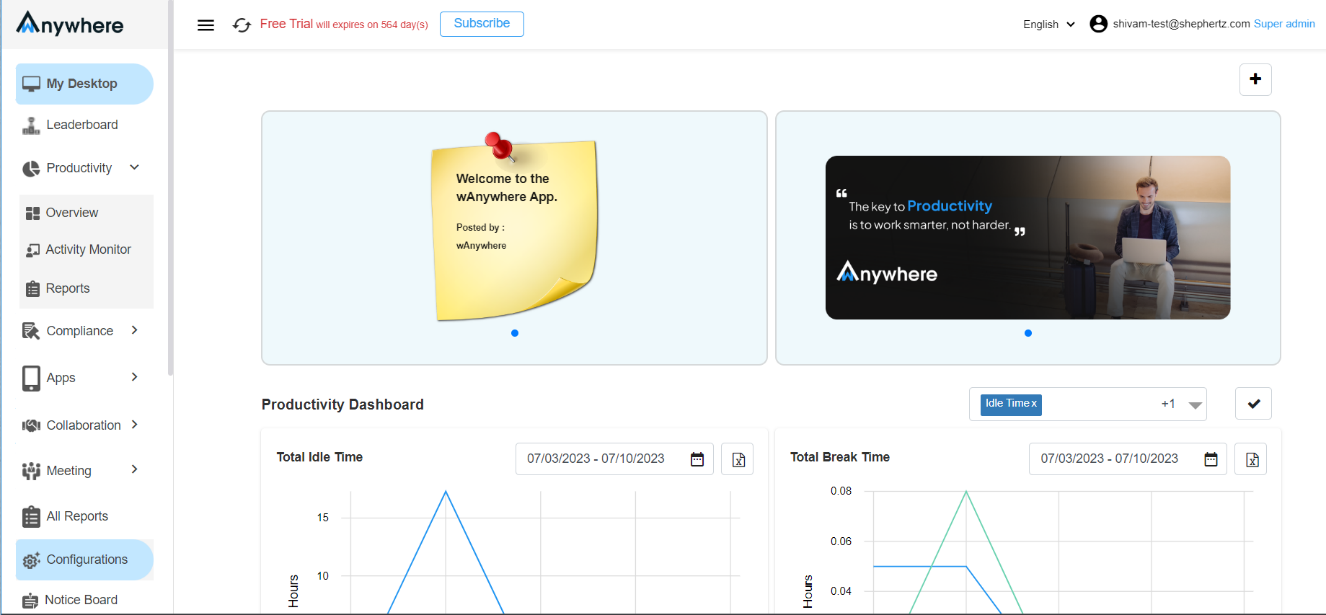
Open Configuration Module
Click on the ‘Configuration’ module in the wAnywhere Console.
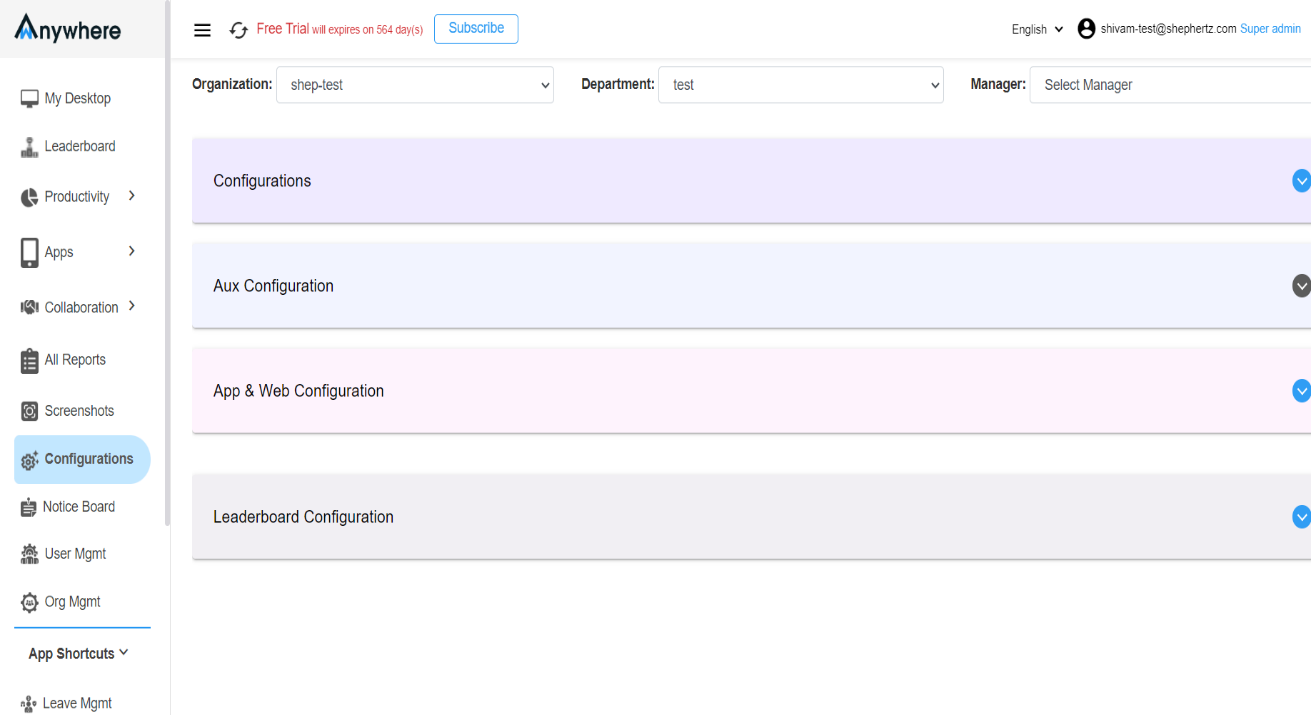
Open Aux Configuration
Click on the ‘Aux Configuration’ dropdown to configure Aux settings.
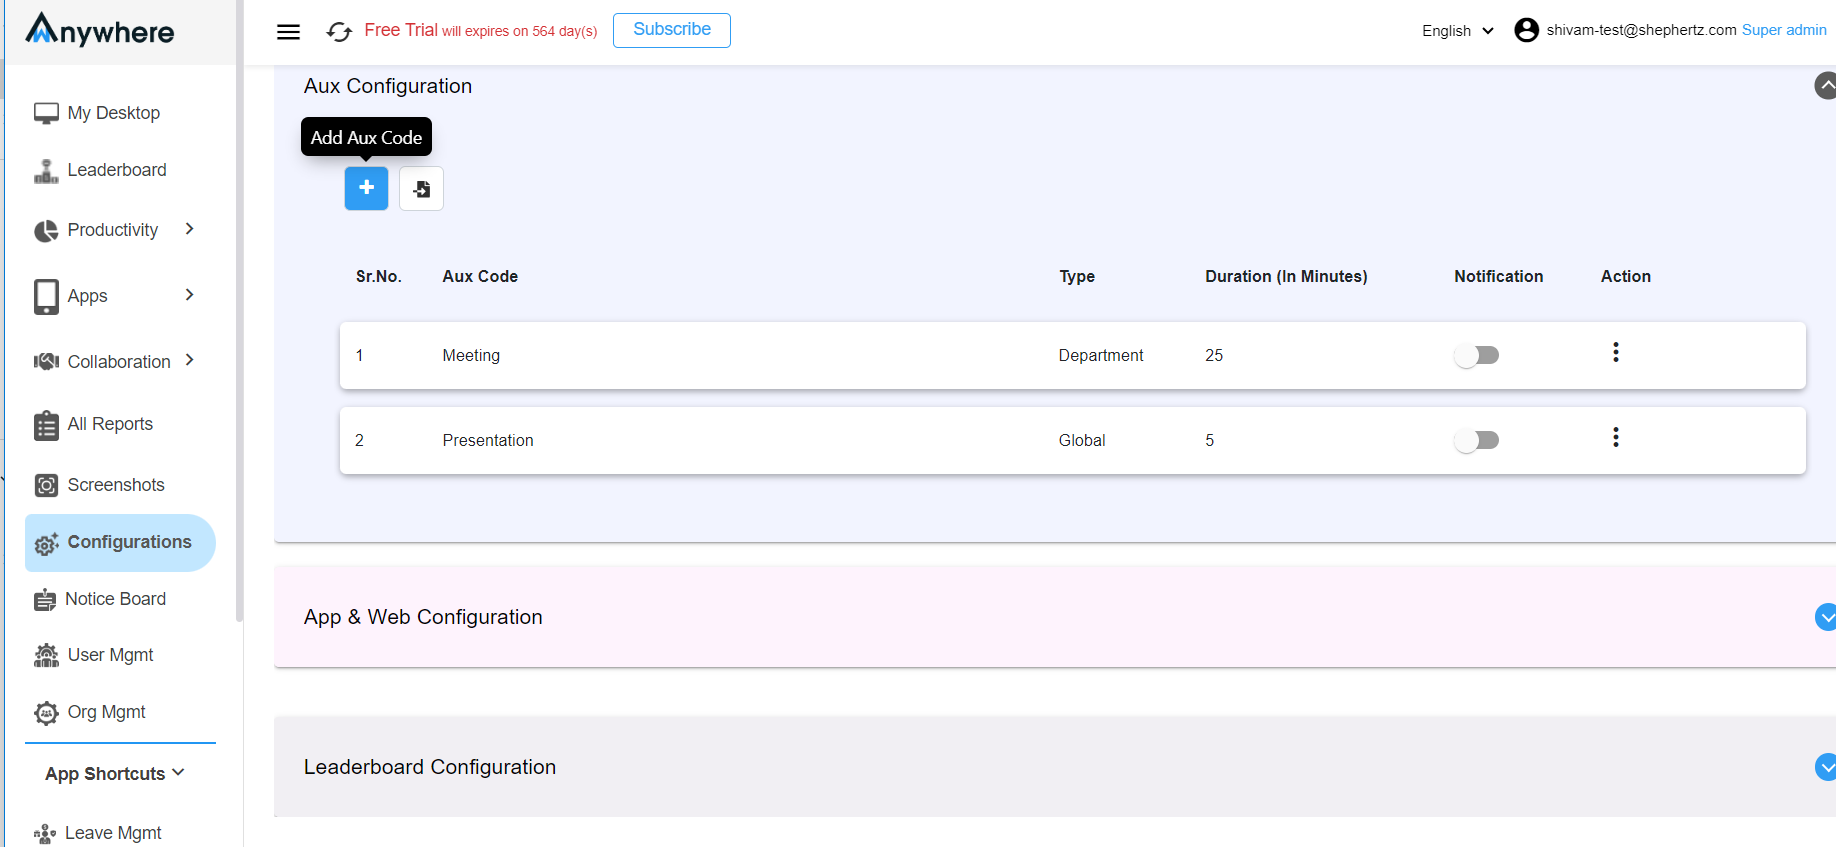
Add New Aux
Click on the ‘Add Aux’ icon to create a new Aux code.
Enter Required Parameters
Fill in all required parameters for the Aux configuration.
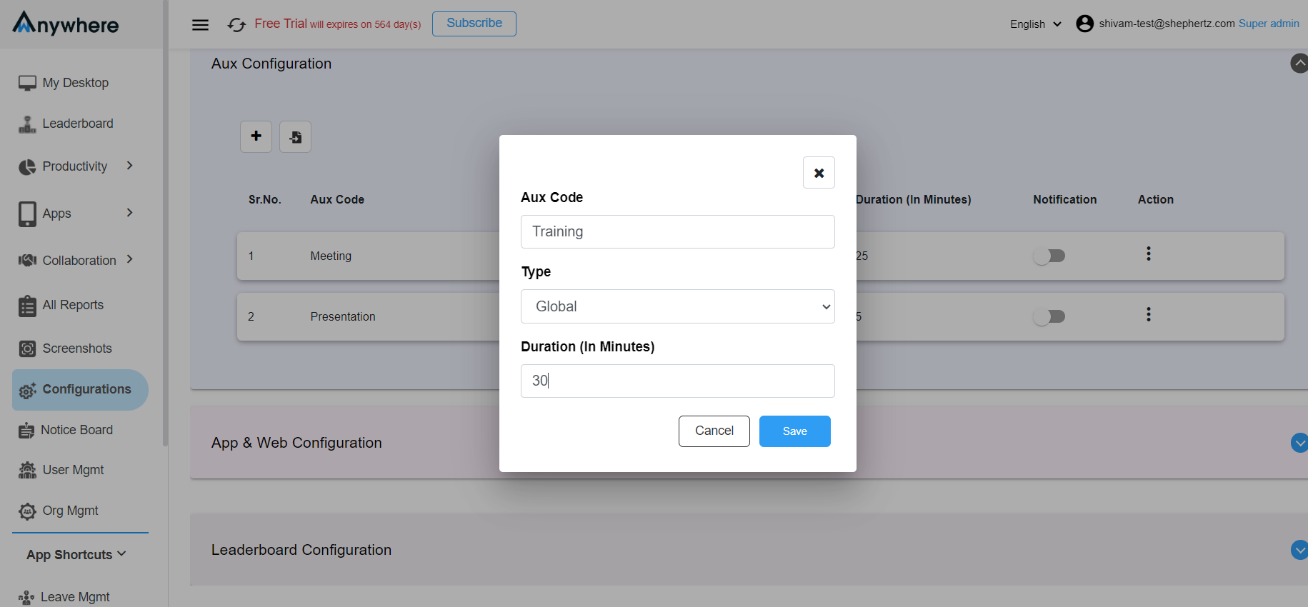
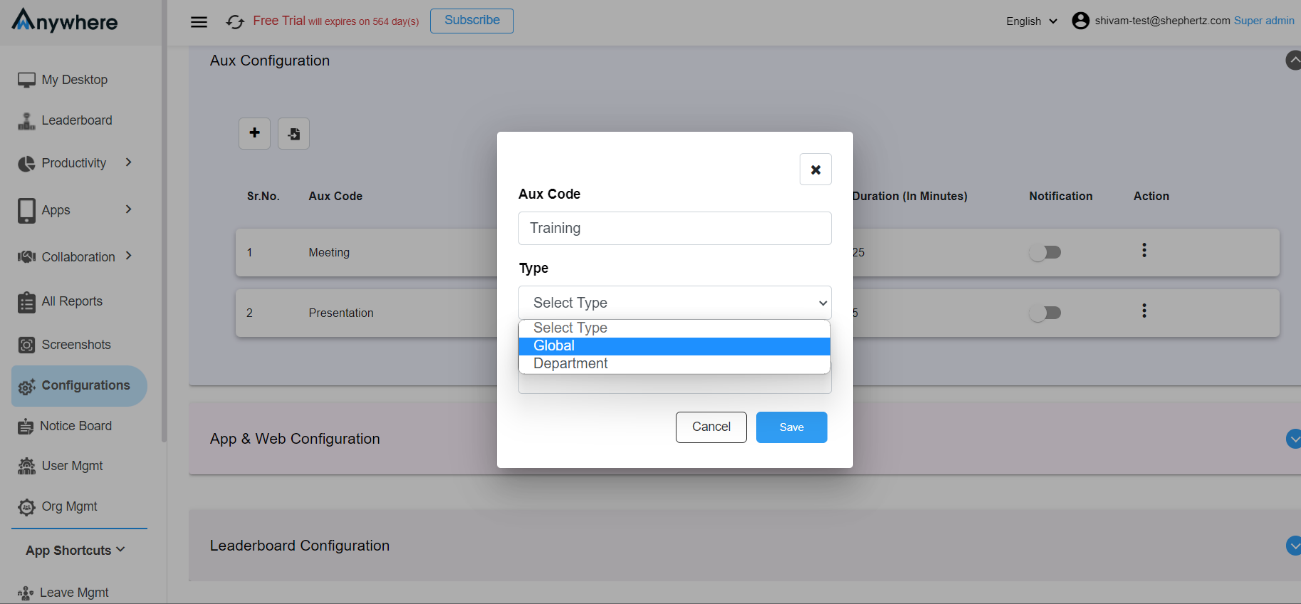
Select Aux Type
Choose either ‘Global’ for all departments or
‘Department’ for a specific department.
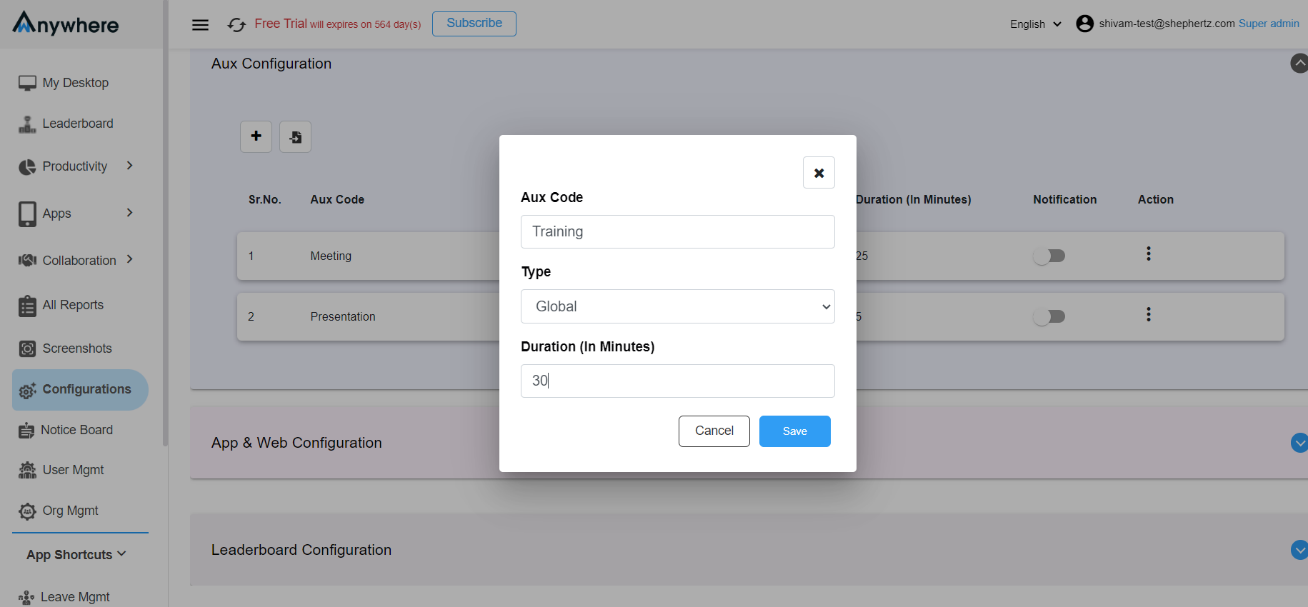
Save Aux Code
Click the ‘Save’ button to create the Aux code.
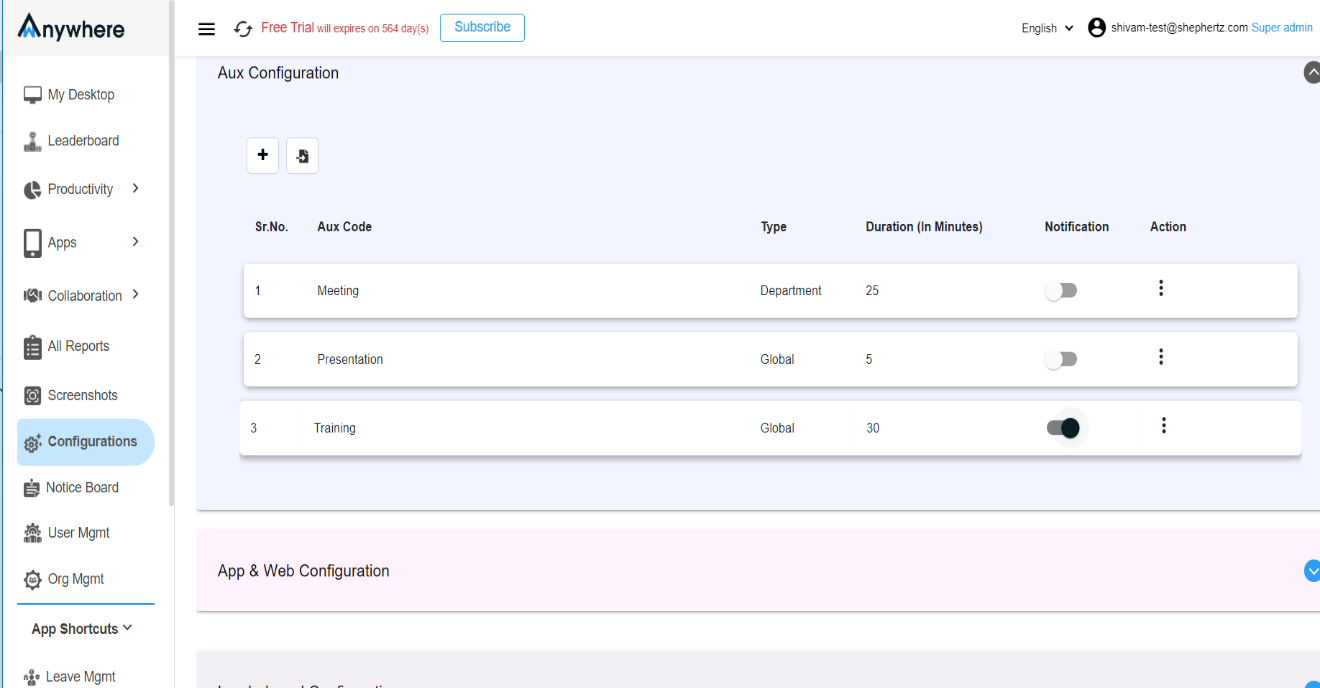
Enable or Disable Notifications
Use the notification toggle to enable or disable Aux notifications.
Import Multiple Aux Codes
Click the ‘Import Aux Codes’ icon to add multiple Aux codes through an Excel file.
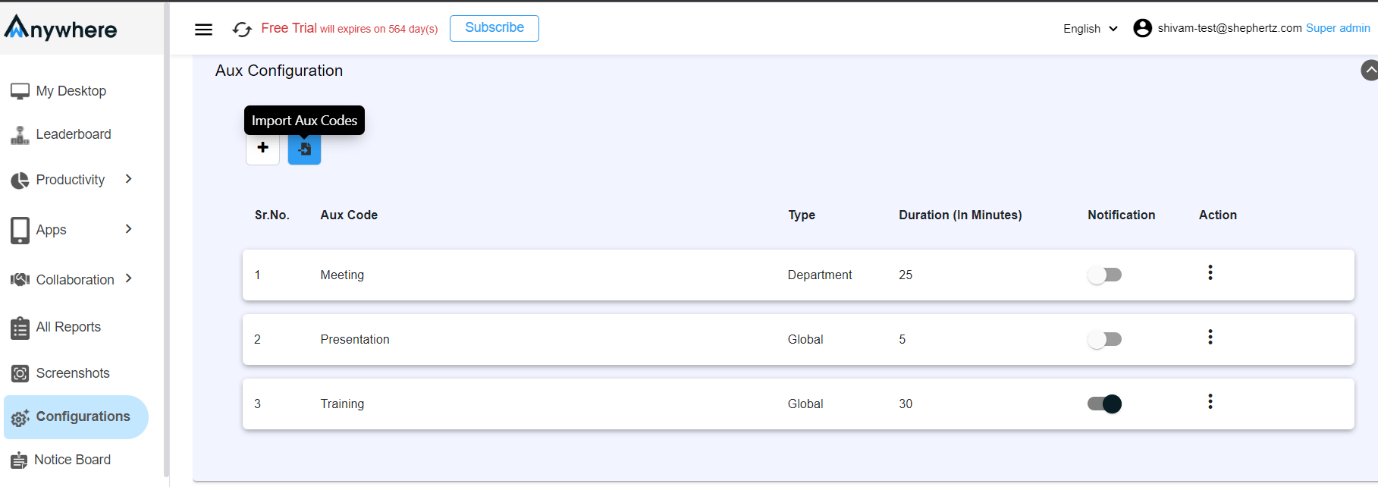
Download Sample File
Download the sample Excel sheet before importing Aux codes.
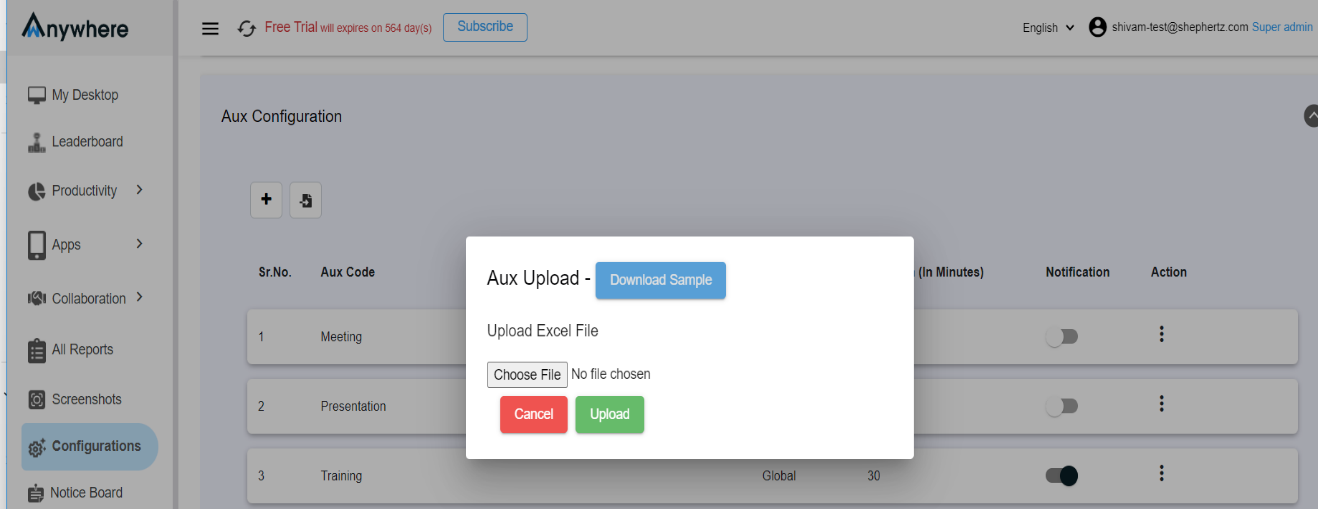
Fill Sample Sheet
Enter all required parameters in the Excel sheet. Use
‘True’ or ‘False’ to enable or disable features.

Choose File
Select the completed Excel file for upload.
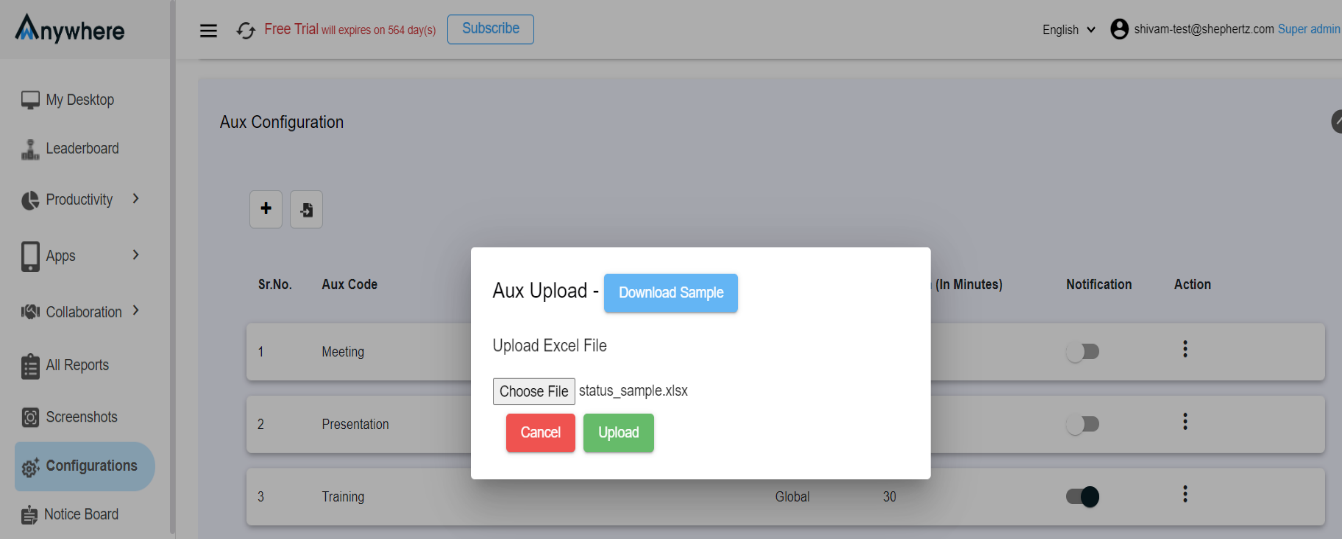
Upload File
Click the ‘Upload’ button to upload the Excel file.
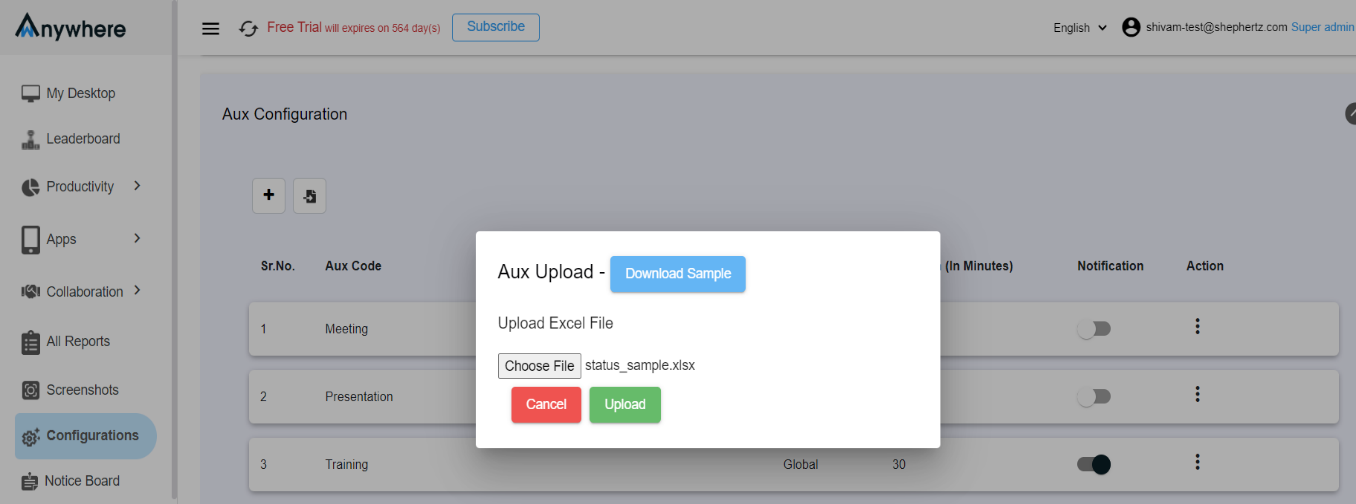
Manage Existing Aux Codes
Click the three dots under the ‘Action’ column to view Edit or Delete options.
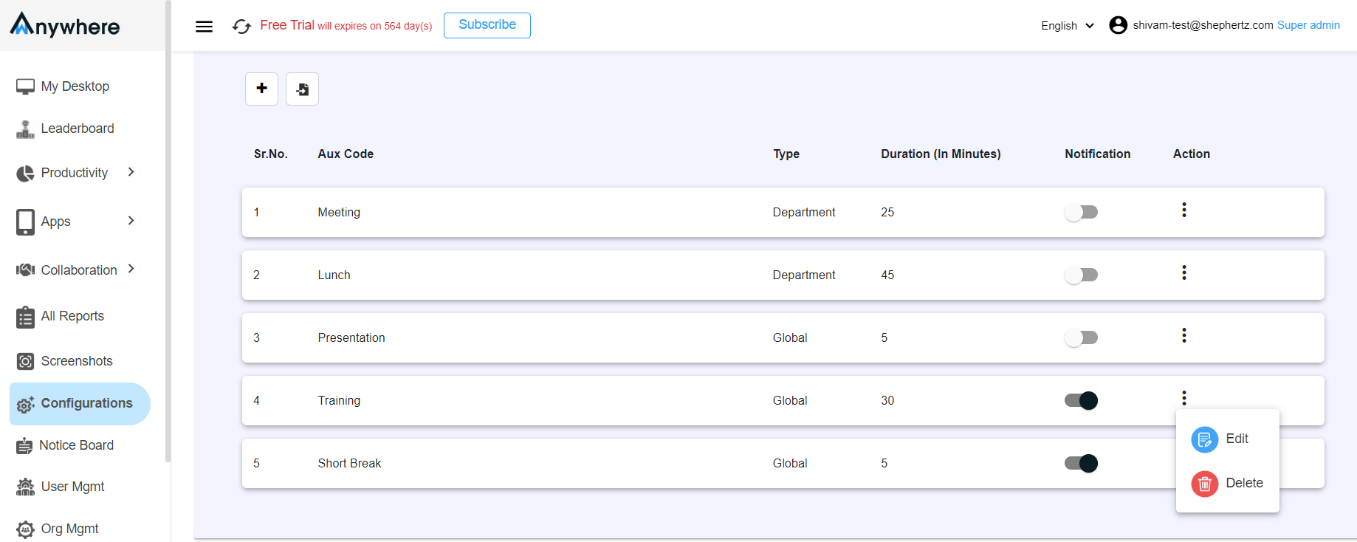
Edit Aux Details
Edit the Aux name and duration as required.
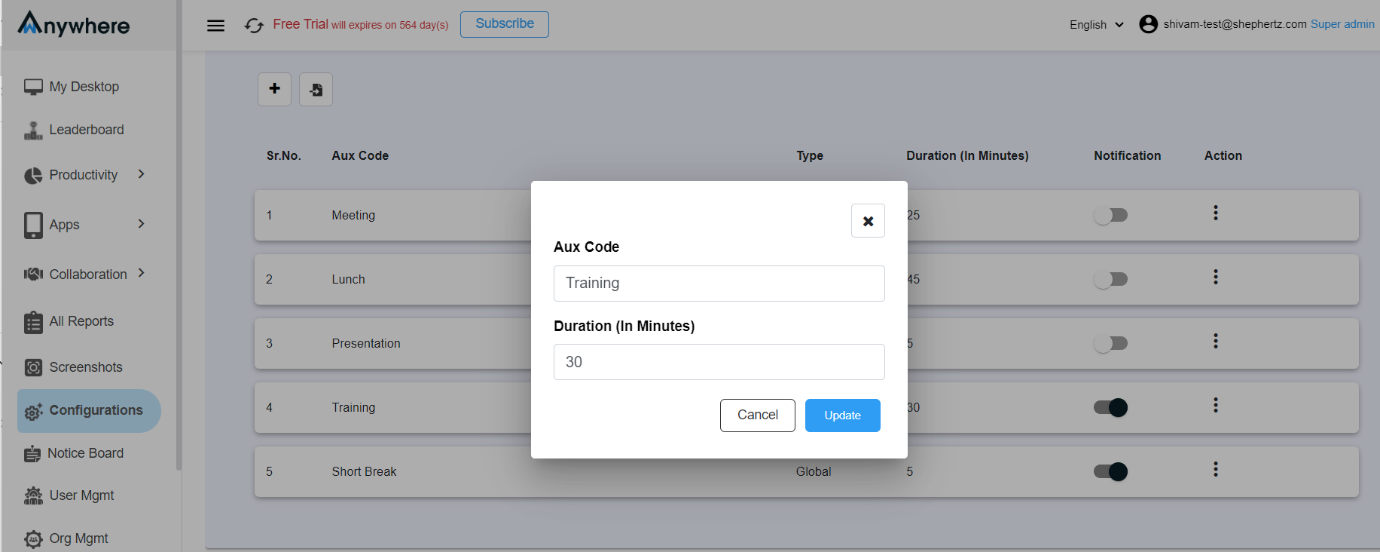
Update Changes
Click the ‘Update’ button to save your modifications.
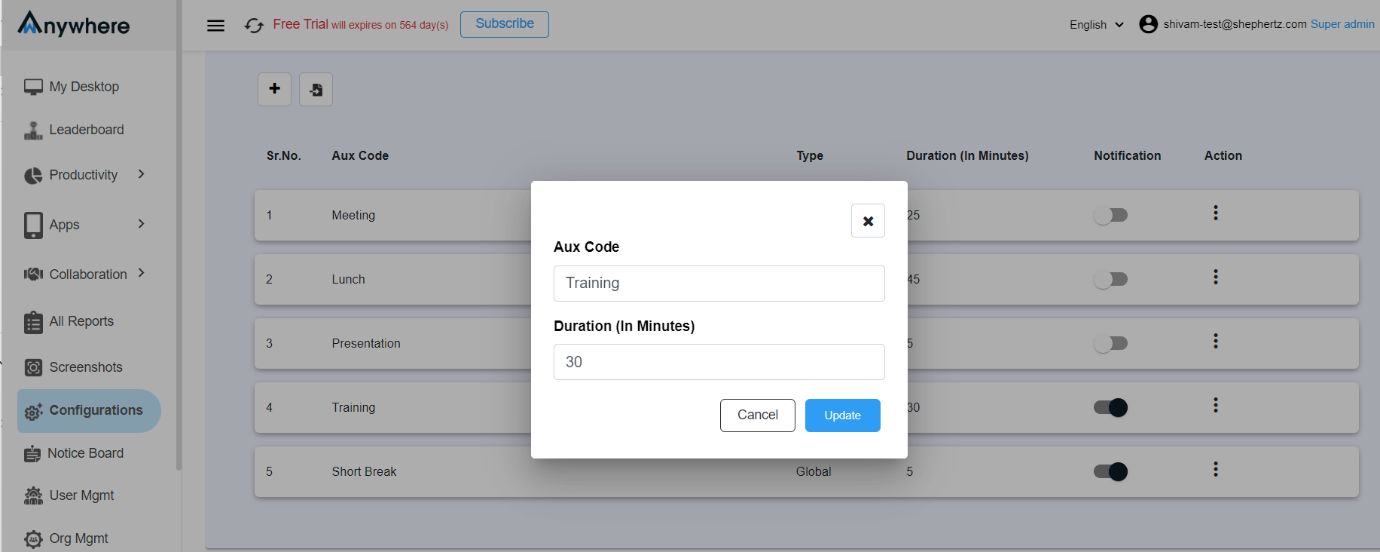
Delete Aux
Select the ‘Delete’ option to remove an Aux code.
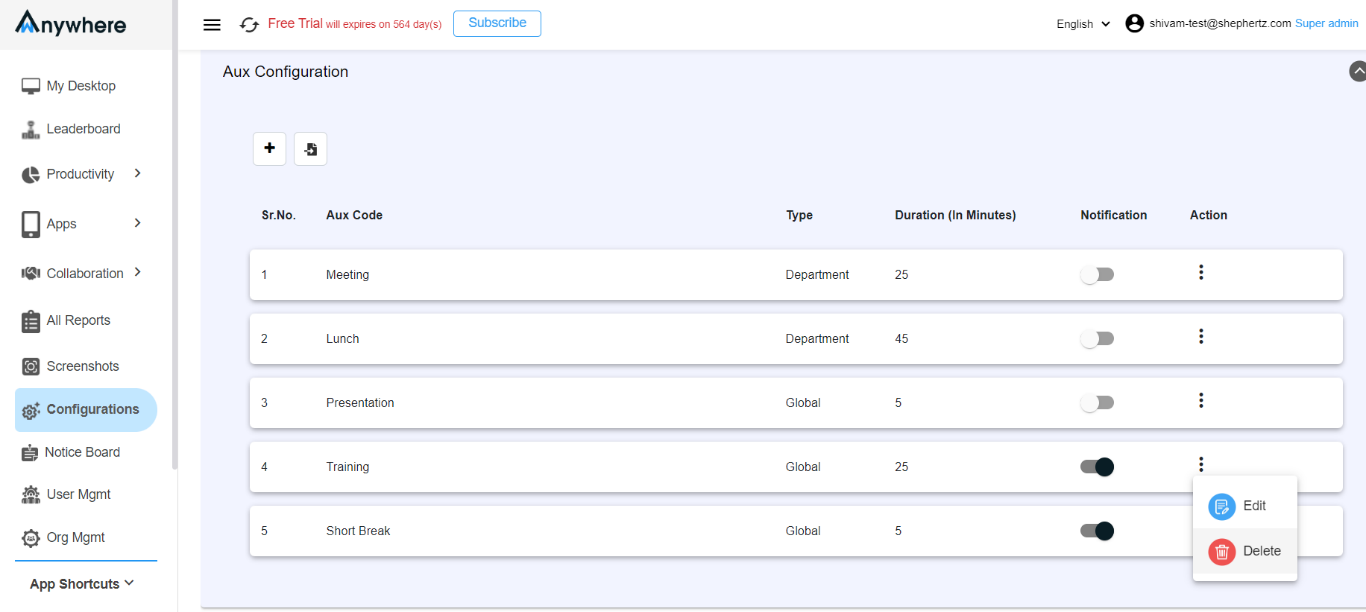
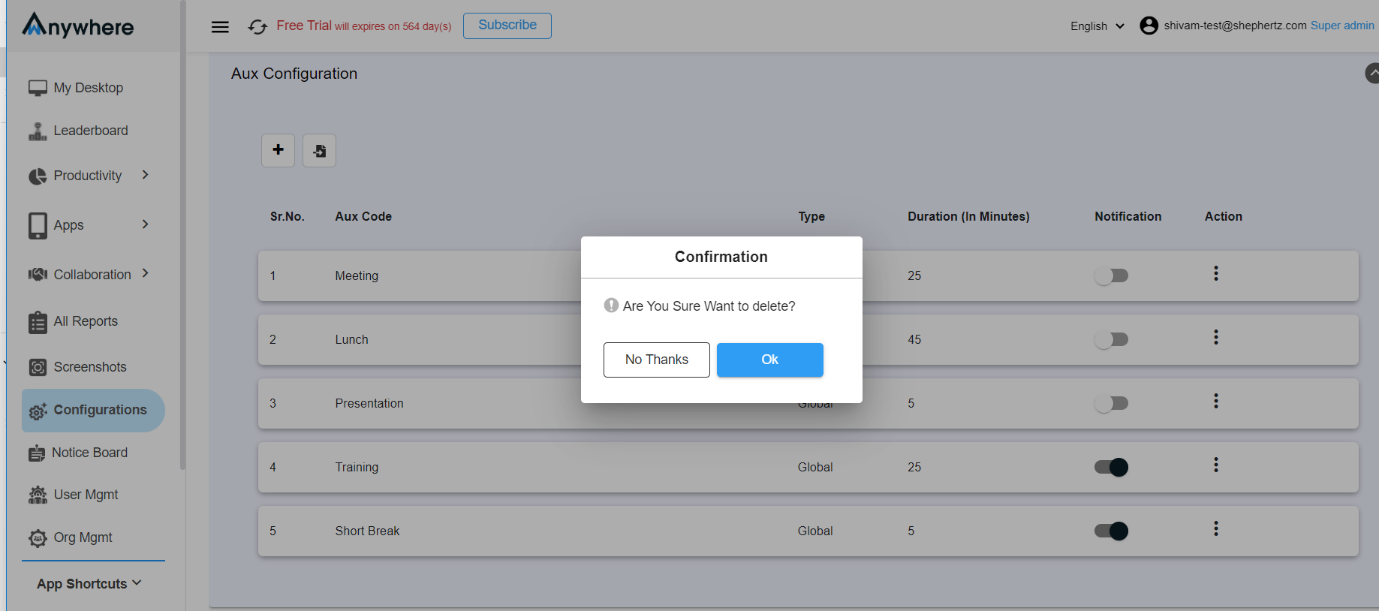
Confirm Deletion
Click the ‘OK’ button to confirm deletion of the Aux code.